If you have an automatic sprinkler system, or if you are considering adding an automatic sprinkler system to your home, this article and video will help you understand how your system works, how to winterize your system, what is involved in spring care for your system, and some operating tips for getting the most out of your system:
- How Your System Works
- Winterizing Your System
- Spring Care
- Operating Tips
Water Supply:
The source of the water that is used to irrigate your lawn and landscape can be: the public water supply for your home; a private well on your property that serves your home; a private well that is just used for lawn irrigation; a rainwater harvesting system that uses water from your roof gutters; or a “greywater” system which uses waste water from your showers, baths, washing machines and sinks.
Controller:
The controller for your sprinkler system is an electronic box typically located in your garage, which can be programmed to tell the valves that control water flow to different parts (zones) of your lawn when to turn on, and when to turn off. More sophisticated controllers will allow you to program alternating days or ratchet up or down the watering times by preset percentages during different months, etc. In addition, some controllers can be connected to rain sensors, which stop the distribution of water to your lawn if it detects that it has recently rained.
Zone Control Valves:
The zone control valves are the electronic valves that are usually buried in your yard, which when energized, allow water to flow to a particular section of your lawn or landscape. If you have seen a green covered box in your yard about 1 foot long and 8” wide, this is an example of where zone control valves have been placed. Wires from the controller provide power to the valves when it is the controller tells them it is time for them to turn on. These valves are in the branches of underground pipes which distribute water from a main supply point to the various sections of your lawn or landscape.
Backflow Preventer:
An important safety feature of an automatic sprinkler system is a backflow preventer. This is a special valve which is designed to make sure that water which has gone into your irrigation system cannot re-enter the water supply for your home and contaminate it.
Rain Sensor:
On days when it has been raining recently, your sprinkler system does not need to be turned on. A rain sensor is a device which detects when it has been raining, and then tells the controller to skip the next cycle for distributing water. An example type of rain sensor is one that has a pad inside a small cylinder, and when the pad gets wet it swells, which causes two electrical contacts to move apart, and this is what tells the controller not to run the next cycle.
Sprinklers:
And lastly, there are the sprinklers which distribute the water. There are four basic types of sprinklers: spray (fixed or pop-up); rotor (fixed or pop-up); drip; and bubbler.
Spray (fixed or pop-up): These are the small heads that spray a fan-shaped pattern of water. They can be “fixed” in position, which mean they are always sticking up out of the ground, or they can be “pop-up” style, which means that when the zone valve which controls water flow to them is energized, the water pressure causes the spray head to pop-up out of the ground. The advantage to the pop-up style is that it both reduces tripping hazards in your yard, and it protects the spray head from damage. Most spray heads can be adjusted to set the spray pattern (1/2 circle, full circle, etc.) and the radius of how far the water is thrown. A typical spray head will have a watering radius of about 8-10 feet, and requires a water pressure of about 20-30 psi to operate properly.
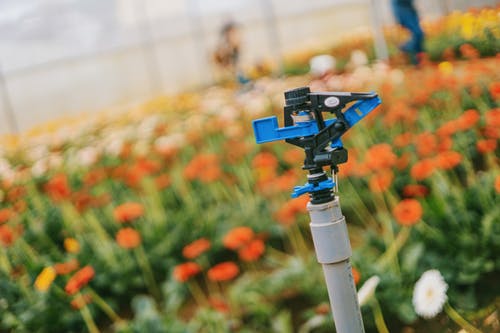
Rotors (fixed or pop-up): Rotor style sprinklers operate by using water pressure to slowly turn the head back and forth as it is spraying water. One familiar type of rotor head is an “impact” rotor which is recognized by the distinctive sound it makes when operating: ticka, ticka, ticka, tic, tic, tic, ticka, ticka, ticka. However, these days impact rotors are being replaced by gear-driven rotors which are very quiet, lower maintenance, and much smaller in size. Rotors can be spaced from 15-65 feet apart, and most residential spacing require 25-35 psi of water pressure to operate their spray heads.
Drip: Drip irrigation systems use a low-pressure perforated water hose instead of a spray head to distribute water. This type of sprinkler works best around flowers or garden beds, where you don’t want a strong spray to damage leaves or flowers. The perforated hose is placed on the ground, or sometimes just below the surface.
Bubbler: Bubbler’s are used for deep watering around shrubbery or trees. When the valve is activated, a head pops up that allows water to “bubble” out and soak slowly into the ground.
Depending on the size, configuration, and watering needs of your lawn and landscaping, your automatic sprinkler system will utilize one or more of these four types of sprinkler heads.
WINTERIZING YOUR SYSTEM
If you live in a part of the country where it gets cold enough to freeze in the winter, then you should definitely winterize your system to prevent damage to your system. When water freezes, it expands and generates enormous pressure (over 100,000 psi!), which can easily burst your sprinkler heads, zone valves, underground piping, etc. Sprinkler heads and zone valves are expensive to replace, and if you burst one of your underground pipes, it can be very expensive to dig up the line to find where it has broken . . . or it could even cause your system to have an undetected leak, which could cost you wasted water for years.
An important aspect of winterizing your sprinkler system is draining all of the water out. Depending on the design of your system, draining your system may involve manual valves, automatic drain valves, or may require the water to be blown out of the system using a high-pressure compressor. If you are not sure of the drainage procedure for your particular system, you should have it checked by an irrigation professional. If they are still not sure what was installed, then it’s best to blow out the water with a compressor.
But we strongly suggested that you NOT do this yourself, and instead use a professional to blow out your sprinkler system for several reasons:
It can be dangerous. Blowing out the system requires the use of very high air pressure (up to 50 psi for systems with polyethylene piping, and up to 80 psi for systems with PVC piping). Being near a sprinkler head that is over-pressured can lead to serious injuries.
It is expensive to buy or rent a high-pressure compressor. When you factor in the cost of either buying or renting a high-pressure compressor, plus the time required to properly blow out each zone of your system, it is usually more cost-effective to hire a professional service.
It is easy to damage your system. As mentioned earlier, blowing out your system requires high pressure, and if you are not very careful, you can over-pressure your system and damage your valves, sprinklers, pipes, etc. Plus if you do the process incorrectly, water could still remain in parts of your system, and could then freeze and damage your system.
With that said, here is a checklist of the tasks which your professional should do to winterize most types of automatic sprinkler systems:
- Block water supply and drain the shutoff valves.
- Blow out all water from your entire system (or ensure that it has drained).
- Disconnect the controller.
- Drain your backflow preventer.
- Cover the rain sensor with a plastic bag to keep rain off of it, or better yet, disconnect it and bring it inside.
- Remove and cap sprinklers that are located near your driveway, or anywhere that sprinkler heads can be damaged over the winter from a plowing service, etc.
SPRING CARE FOR YOUR SYSTEM
Next, let’s look at what you should do to start up your system in the spring:
- Open the water supply to your sprinkler system.
- Reconnect the controller.
- Uncover or re-install your rain sensor.
- Re-install any sprinkler heads that have been capped off and removed for the winter.
- Conduct a static leak inspection. Walk around your system and look for any signs of water leaks.
- Pressure up each zone. In manual mode on your controller, pressure up (turn on) each zone one at a time, and inspect for the following:
Look for wet spots: Wets spots in your yard can be an indication of a stuck pop-up sprinkler or a leak in your sprinkler heads, zone valves, or pipes.
Clear out around sprinkler heads: Check to see if the ground, shrubs, etc. around your sprinkler heads are impinging on them and making it difficult for them to pop-up or spray properly.
Check pressure and spray coverage: If it does not appear that the sprinkler heads are putting out enough water, check to see if either the nozzle has gotten plugged, or if the filter inside of the sprinkler head has gotten clogged with debris. And check that the rotation of rotor heads are traveling to the correct angles and that sprays, drips, and bubbler’s are all operating properly.
- Replace backup battery. If your controller has a backup battery, then change it so that you don’t lose your programs if there is a power failure.
- Check / set the timing for each zone. On your controller unit, confirm the proper settings for how you want your system to operate. Set each zone, and set the frequency of when you want the cycles to run. Confirm the correct clock settings for the current date, time, day of the week, etc.
- Check your water meter for any indications of an underground leak. Turn off all water uses in your house (washing machine, dishwasher, showers, etc.), and then look at your water meter over the course of several hours to see if the meter is moving at all. If it is, then you may have a hidden leak somewhere in your sprinkler system.
OPERATING TIPS
And finally, let’s now look at some operating tips to help you to make the best use your automatic sprinkler system:
Watch your first week
When you start your system in the spring, carefully watch it the first week to be sure that the programs are running properly.
Install a good quality rain detector
Sometimes the rain detector that comes with a new system may not be of the best quality. If you find your system running too soon after you have had a rainstorm, then you should consider replacing your rain detector with a better quality one (see types, costs, and reviews of rain detectors).
Frequently check your system for damaged sprinkler heads.
If you see large wet spots near your sprinkler heads, then this could be a sign that your sprinkler head is damaged and allowing too much water to come out during its cycle.
Install drip or bubbler sprinklers
To serve specific watering needs around your lawn or landscape, you may want to change or add a drip or bubbler sprinkler.
Consider xeriscaping landscaping techniques
Using xeriscaping low-water landscaping techniques can reduce your need for running your sprinklers as often.
Water according to your lawn’s actual needs
Rather than watering on a set schedule, instead only run your sprinkler cycles on days when your lawn actually needs watering. The most accurate way to determine whether your lawn needs watering is to observe the condition of your grass. When grass needs water it will begin to take on a blue-gray tint, and the older leaf blades will begin to curl-up or wilt. Also, footprints will remain on the grass for longer than usual, rather than bounce right back. When 1/3 to 1/2 of your lawn begins to show these symptoms, then it’s time to water.
Try reducing each zone by 1 minute
If you do decide to run your program on a daily / weekly cycle, try reducing the watering time of each of your zones by 1 minute, and see if you notice any difference with your lawn. A typical sprinkler zone uses 20 gallons of water each minute, and assuming the average lawn has five zones and is watered every other day, this small change can save you 1,500 gallons of water each month!
Install a “greywater” recycling system
Depending on your situation, you may be able to use water captured from your roof gutters or water recycled from your showers, washing machines, and sinks as a water supply for your lawn and landscaping.
Drill an irrigation well.
If you are supplied with public water to your home, you may want to consider drilling a well to serve your outside irrigation needs.
Install a separate water meter for your system
If you are on a public sewer system, then you may be able to get a lower rate for water that is used by your sprinkler system (since this water does not go down your drains and load up the public wastewater treating facility).
SUMMARY
We hope this article and video has helped you to understand how your automatic sprinkler system works, how to winterize your system, what is involved in the spring care for your system, and that it has given you some ideas for helpful operating tips for getting the most out of your system.